Bubble Wrap Hammer Painting: A 10-Minute Toddler Art Activity
By Katie · Mom of 2 under 3. Founder, Screen Free Toddlers.
· 9 min read · @screenfree_toddlers
Bubble wrap hammer painting is a 10-minute toddler art activity using paint, paper, and a toy hammer. Why it works, how to set it up, and the messy part.
Time: 10-15 minutes | Age: 18 months-4 years | Setup: 5 minutes | Mess Level: Medium
My toddler wanted to paint. My dad was in town, and he is an actual artist, so an afternoon making a mess with her was his idea of perfect. The problem was the rest of it. I love my dad, but he is not going to notice paint heading for the rug until it is already there. And I had the baby and my mom too, and I wanted to sit with them, not stand guard over a paint situation. So I needed a paint activity I could set up, hand off, and walk away from.
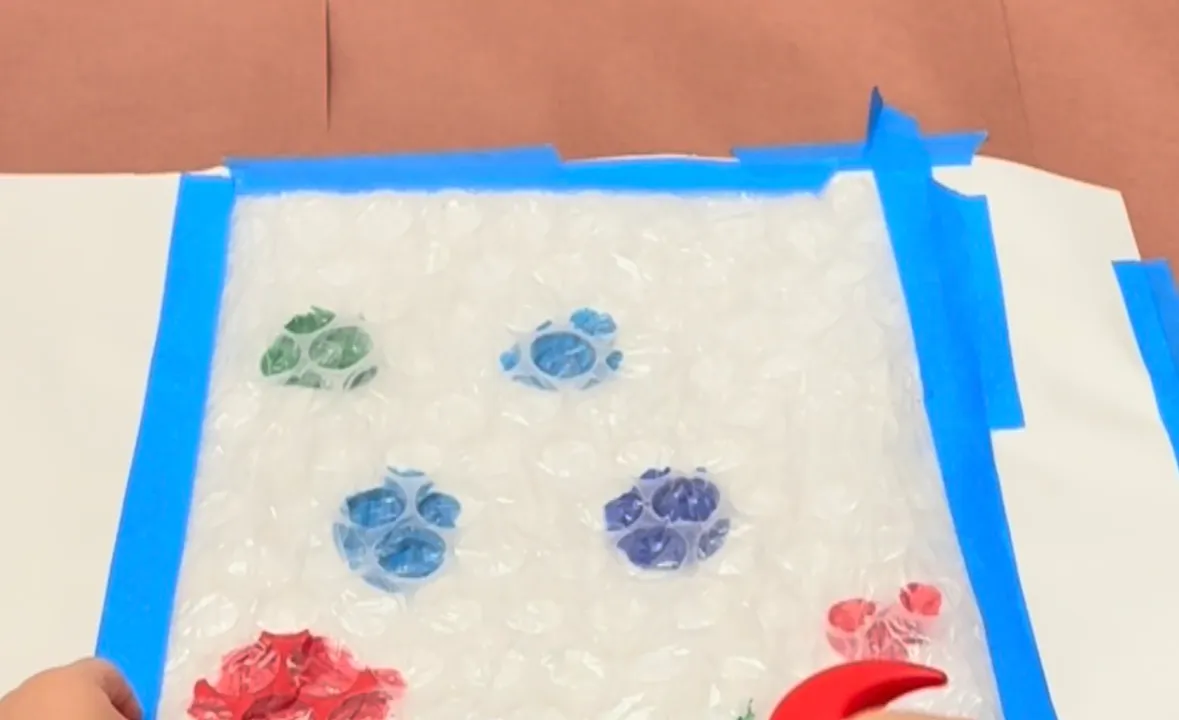
Bubble wrap hammer painting solved it. You cover the table, tape paint under a sheet of bubble wrap, and hand over a toy hammer. The paint is sealed under there, so it cannot travel while they whack away, and when you peel it back there is a real, popped, textured painting underneath. The toddler thinks they are smashing something. They are actually making art, and you are free to step out of the room.
Here is how to set it up, why the hammering holds their attention, how to adjust it by age, and what to do when they ditch the hammer to put both hands straight in the paint.
Why Bubble Wrap Hammer Painting Works for Toddlers
Toddlers are wired to bang on things. That is not a behavior problem, it is hand-eye coordination and gross motor control developing in real time. A toy hammer gives that urge a target and a result, which is the part their brain is hunting for. According to the CDC’s developmental milestones, toddlers between 18 months and 3 years are working hard on using objects as tools and figuring out that their own actions cause a change in the world.
Bubble wrap hammer painting stacks three of those skills into one setup. The hammering is gross motor and aim. The tapping to pop specific bubbles is fine motor. And the big payoff, where the paint spreads and the bubbles flatten, is cause and effect they can see happening with every hit. They tap, the color moves. They tap harder, more of it shows. There is no screen pacing it for them. They control the whole thing.
You will notice a kind of focus that does not show up in front of a screen. Quiet, busy concentration, a kid working out how hard to swing to make the thing happen.
What You Need
- Butcher or craft paper to cover the table. This is your drop cloth. A roll end works great and tapes down flat.
- 1 sheet of white paper to paint on. Taped on top of the craft paper. White makes the colors pop when you peel the bubble wrap back.
- Washable kids paint in 2-3 colors. Washable tempera comes off skin and clothes with water. More than one color makes the reveal worth it.
- A piece of bubble wrap. Big enough to cover all the paint. The kind from a shipping box is perfect, so save it next time something ships.
- Painters tape. It holds everything down and peels up without wrecking your table.
- 1 soft toy hammer. Plastic or wood. The toddler one from a pound-a-peg set is ideal.
Total cost: under $5, and most of it you already have.
How to Set Up Bubble Wrap Hammer Painting
- Cover your table with butcher or craft paper and tape it down so it works as a drop cloth.
- Tape a sheet of white paper on top of the craft paper so they have a clean surface to paint on.
- Squeeze blobs of washable paint across the white paper in a few colors, spaced out rather than pooled in one spot.
- Lay a piece of bubble wrap over the paint, bubble side down, so the bubbles press into the color.
- Tape all four edges of the bubble wrap down flat so it stays put and the paint stays sealed underneath.
- Hand your toddler the toy hammer and let them tap and whack the bubble wrap to spread the paint.
If your toddler finishes the first sheet fast, switch the colors or tape down a fresh sheet next to the first. Or skip the hammer and let them press the bubble wrap with their hands, which spreads the paint a different way and pops the bubbles they missed.
If they lose interest in the hammering itself, the reveal usually pulls them back in. Peel one corner of the bubble wrap up slowly so they can see the painting hiding under it. That moment tends to restart the whole thing. If your toddler turns out to be more into the paint than the hammer, pine cone painting gives them another hands-on way to push color around.
Love this one? There are 75 more.
The 75 Toddler Activities Guide is a flip-through bank of screen-free activities, all using things you already have at home. Pick one, set it up, buy yourself 15–20 minutes.
See the 75 Activities Guide →Age Tweaks
For 18 Month to 2 Year Olds
At this age the hammer is more of a tapper than a tool, and that is exactly right. They are working on grip and on the idea that hitting one thing moves another. Keep the paint blobs big so even light taps make color spread. Expect them to touch the bubble wrap directly, and let them. The popping is half the fun.
For 2 to 3 Year Olds
This is the sweet spot. They can aim the hammer, swing with intent, and they start to notice the color showing through where they hit. Name what is happening as they go, like “you popped that one” or “look how the blue spread.” They are building the language to match the action, and the running commentary keeps them in it longer.
For 3 to 4 Year Olds
Older toddlers care about the result, not just the smashing. Tell them up front that a painting is hiding under the bubble wrap and they get to find it. Let them choose the colors. At this age you can add a second round where they paint on top of the dried, textured print with a brush, which turns one activity into two.
What Happened When We Did It
I set this up on the kitchen table mid-morning, with craft paper taped down over the whole thing and the white paper taped on top of that. Paint, bubble wrap, tape, hammer. My dad pulled up a chair next to her like it was a gallery opening. Then I did the thing I actually set it up to do. I left.
I went and sat with the baby and my mom in the other room while my dad and my toddler hammered away. That was the win. Not the painting. The fact that I could hand off a paint activity to a grandpa who does not think about mess and trust the paint was going nowhere.
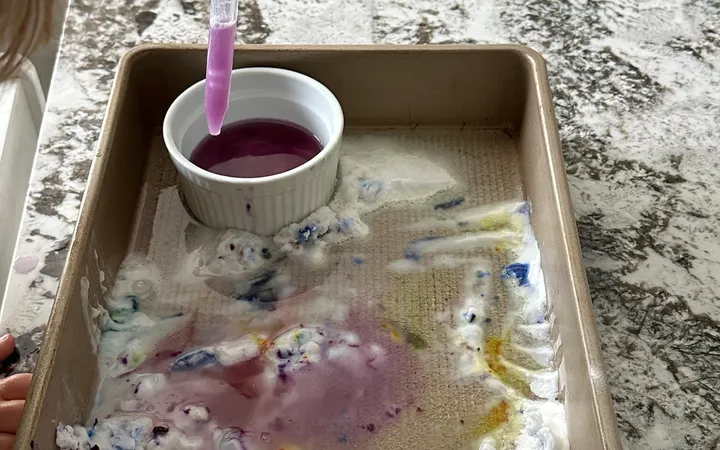
When I came back she had peeled the bubble wrap off and put both hands in the paint, which she enjoyed more than the hammer. Paint up to her wrists, a painting to show me, my dad beaming. Hands wash. The table was covered and the rug stayed clean.
No energy to plan tomorrow's activity?
The 75 Toddler Activities Guide does the thinking for you. 75 ideas sorted by setup time and materials. Less mental load for you, a happy and engaged toddler for them.
Get the 75 Activities Guide →Common Issues and Troubleshooting
My toddler peeled the bubble wrap off in the first 30 seconds.
Tape it down harder, all four edges, and press the tape flat. If they still get under it, lean into it. Let them press and squish the paint with their hands, then re-cover a fresh blob and hand the hammer back. Peeling is part of the activity, not a failure of it.
The paint squished out the sides everywhere.
Use less paint than feels right, and space the blobs toward the center, not the edges. The bubble wrap pushes paint outward as they hammer, so leaving a paint-free border gives it somewhere to go.
My toddler skipped the hammer and went straight for the paint.
That counts. The sensory pull of the paint is strong and there is nothing wrong with following it. Keep the hammer nearby and offer it again once the squish wears off.
She lost interest after a few whacks.
Peel a corner of the bubble wrap up so the painting underneath shows. The reveal usually restarts it. If it does not, she got what she needed today, and a few minutes still counts.
Frequently Asked Questions
What age is bubble wrap hammer painting good for?
It works for toddlers from about 18 months to 4 years. Younger toddlers will tap and press more than swing, which is fine. Older toddlers will hammer harder and care more about the finished painting underneath.
Is a toy hammer safe for a toddler to use?
A soft plastic or wooden toy hammer is safe for supervised play. Stay close, keep the hammering aimed at the bubble wrap, and put it away when you are done. Skip a real hammer of any kind.
How do I keep the paint from getting everywhere?
The bubble wrap seals most of the paint against the paper, so the hammering stage stays pretty contained. The mess comes at the reveal, when you peel the bubble wrap off. Do it on a wipeable surface or a towel and keep a wet cloth within reach.
What kind of paint should I use?
Washable kids paint or washable tempera is the easy choice. It comes off skin, clothes, and most surfaces with water. A few colors look better than one once you peel the bubble wrap back.
How long does it actually keep a toddler busy?
Plan for 10 to 15 minutes. The hammering holds their attention, and then the peel and the squish of the paint buys a few more. You can stretch it by setting up a second sheet while they finish the first.
Mom to Mom
Not every activity lands the way you picture it. I set this one up imagining a sweet little painting, and what I got was a kid elbow-deep in tempera with a very proud grandpa watching. That still counts as a win. The point was never a perfect painting. It was that I could cover the table, hand it off, and go be with my other kid without bracing for paint on the rug. If the hammer gets ignored and the hands take over, you did not do it wrong. You just found out what your kid was into that day, and you still got your few minutes.
If this one let you step away for a few minutes, you’ll want a stack of them ready for the days you have nothing left. The Library of 75 Toddler Activities is the same kind of low-prep, real-life-tested ideas, organized by what your toddler needs that day, whether that is focus, calm, energy out, or hands in something. All using stuff you already have at home.
Want tonight's dinner hour back?
Drop your email. I'll send you TONIGHT, a 3-step reset plan plus 4 setup-free activities for the meltdown hour.
By signing up, you agree to receive the guide and emails from Katie. Unsubscribe anytime.